
Doug
doug@yanzum.com
These quality online stores sell a large
variety of plants and
seeds.


  |
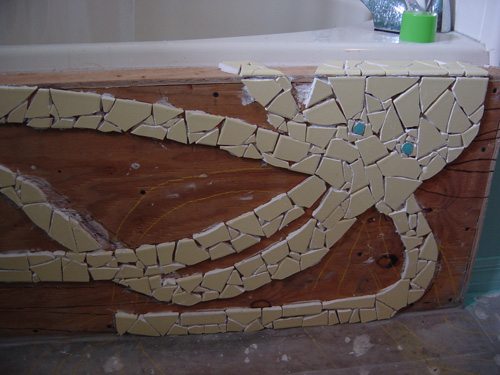
A few years ago I made this mosaic tile
octopus in one of my bathrooms. I originally planned on making it
outside on my patio, but the bathroom needed some attention after I
pulled up the carpet. Yes, the people who built this house actually put
carpet in both bathrooms. It might have felt good on naked feet in the
winter, but it was also a perfect environment for germs and bugs to live
and thrive.

The large tub is a jacuzzi tub that had a foot deep tiled side
enclosure, which created a challenge just to climb over
the side to get in to take a shower. I've never used the jacuzzi part
because it would waste too much water filling the thing. I'm very conservative with my
water usage, as we all should be, because contrary to popular
assumption, water is not an unlimited commodity.
I got brave and removed the large side
enclosure, not knowing what I'd find underneath the tile. Turns out it was a
plywood box of sorts, so I rebuilt it making it as narrow
as possible, then I put it back without the ceramic tile. This gave me a
new “canvas” on which to create my mosaic tile octopus. First I drew it out
with a pencil, placing the octopus head on the side of the tub and the tentacles
going in various directions along the side and onto the floor, making
sure there were 8 of them.
I planned on recycling some old yellow
broken tiles that came from my sister's kitchen when I helped her update
it. The yellow tiles became the actual octopus, while using sample tiles
that I'd gotten from a local flooring store for everything else. The
store owner offered the samples to me when I asked her for some old
carpet to use as a garden weed barrier that turned out to be a failed
experiment. The blue eyes came from a piece of broken blue Chinese
pottery that I split in two and rounded by chipping the edges.
It was relatively easy to place the
tiles, first the yellow within the pencil lines, and then the sample
tiles as background. I didn't have a tile cutter, so I simply broke
large pieces when necessary and then I filled in the spaces with broken
pieces, breaking them further until they fit, leaving a small space for
grout. It was like putting together a giant jig saw puzzle but having to
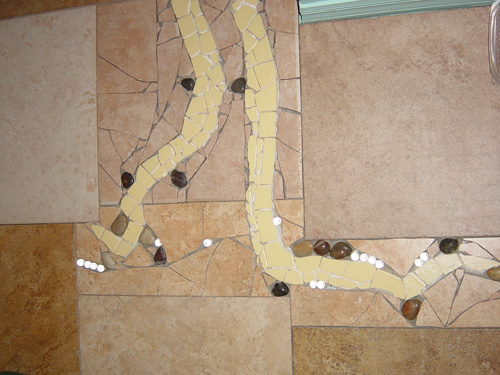
create the pieces as I went along. I used some clear marbles and small
river stones from the dollar store as an added feature. The marbles
represent bubbles. They are sometimes a pain to walk on, but art is a lot
like love....sometimes it hurts. I've gotten quite used to them.
(Note: photo was taken before black grout was added)
I had a lot of the large sample tiles as
you may have noticed on a
previous page where I used them as a pedestal.
For the bathroom project I selected the tiles with similar tones and
coloring. For most of the background I used unbroken tiles, breaking
them only when they didn't fit. The black grout helps make everything
pop with appeal. The overall result is very pleasing because of the
various sizes, shapes, shades and textures. Somehow it all came together
well, with the end result being a one of a kind bathroom floor that I
enjoy every time I see it. My only cost was the grout, adhesive and
dollar store stones and marbles.
Everything else was recycled and cost me nothing.
|
|